Your Cart is Empty


Everything you need in one place to start Lacing It Up! If it's your first time with our sexy little secret, this kit is a must to get the most out of application and extra long-wear. Lace It Up Lashes and tools work as a system to bring you the fluffiest, fullest look you can get with its under- or over- lash application for DIY lash extensions at home. It includes two different lash curls in either Short, Medium, or Long so that you can find your favourite effect - to be used alone or mixed for extra texture. Their soft band ensures that you don't even feel them during wear, and provides a multi-layer texture for the look of professional lash extensions! Our superior Duo Precision Adhesive applies like a mascara for you to attach these lashes where they will be most comfortable and least noticeable - under your lashes. The Curved Lash Applicator has the perfect curve to follow the shape of your eyelid and is comfortable to use with an easy-squeeze grip that bonds your lashes together in seconds. Use our specially formulated Lash Eraser to easily and effortlessly remove the lashes and clean up any glue residue with the Micro Swabs. Take your lashes to new heights and let them speak volumes with Lace It Up lashes, your sexy little secret!
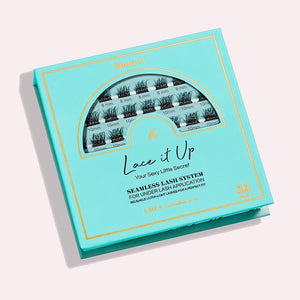
Lashes that last for days with a bandless look that rival real extensions? Don't worry, we won't tell - it can be your secret now, too!
Free Gift with Purchase: Silicone Lash Pad and Beauty Bag
All Kits include:
- Precision Lash Applicator
- Precision Bond Duo Lash Adhesive
- Lash Eraser Wand
- Lash Sealant
- Lash Retoucher
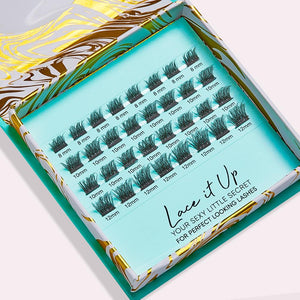
Short Kit Includes:
- 1 C 8-10-12
- 1 D 8-10-12
Medium Kit Includes:
- 1 C 10-12-14
- 1 D 10-12-14
Long Kit Includes:
- 1 C 12-14-16
- 1 D 12-14-16
100% Vegan & Cruelty-Free
No animal testing. No animal-derived ingredients. Ever.
All orders ship via Canada Post or FedEx within 1–2 business days, with tracking information sent to your email.
We’re committed to luxury lashes, reasonable prices, and fast delivery. Got feedback? Email us!
For returns, contact us at info@lashboxlacanada.com.See our Shipping & Returns Policyfor full details.
It is our goal to bring you the highest quality eyelash extension at reasonable pricing which are delivered in a timely fashion. If you have any suggestions for us, please email us! We would love to hear your feedback & suggestions.
To request a return, please email us at info@lashboxlacanada.com
To review our full return policy, please click here.

Consistent Availability & Fast Shipping

Affordable Prices

Caring Support

Vegan & Animal
Cruelty-Free


